
1972 chevelle wiring diagram pdf
1972 Chevelle Wiring Diagram PDF: A Comprehensive Plan
Detailed PDF diagrams from JEGS (19262 & 91363) and ClassicCarWiring LLC offer crucial guidance for restoring or upgrading a 1972 Chevelle’s electrical system.
Accessing a correct 1972 Chevelle wiring diagram PDF is vital for successful restoration, offering schematics for Malibu, Monte Carlo, and El Camino models with detailed color coding.
Importance of a Wiring Diagram
A 1972 Chevelle wiring diagram PDF is indispensable for accurately tracing circuits, identifying components, and resolving electrical faults. JEGS and ClassicCarWiring LLC provide detailed schematics, ensuring correct connections during restoration. Without a diagram, troubleshooting becomes significantly harder, potentially leading to further damage or safety hazards.
Specificity of the 1972 Model Year
The 1972 Chevelle, including Malibu and Monte Carlo variants, possesses a unique electrical system. Diagrams from JEGS and ClassicCarWiring LLC specifically address the 12-pin connector found in 1972 models with round gauge pods; Using a generic diagram can lead to incorrect wiring and system malfunctions.
Understanding the 1972 Chevelle Electrical System
A 1972 Chevelle’s system includes engine, interior, and exterior lighting circuits. Wiring diagrams are essential for tracing these circuits and understanding component interactions.
Core Components and Their Functions
Key components – the ignition, fuel system, lights, and dashboard instruments – rely on a complex wiring network. Diagrams illustrate how these interact. The 12-pin connector on the dashboard is vital for instrument function. Understanding these core elements, aided by a wiring diagram, is crucial for successful restoration.
Voltage and Grounding Systems
1972 Chevelles utilize a 12-volt system, demanding accurate wiring for proper function. Diagrams clearly show positive and negative connections. Effective grounding is essential to prevent electrical issues. PDF schematics detail grounding points, ensuring a stable electrical circuit and reliable performance throughout the vehicle.

Available Wiring Diagram Resources
JEGS offers diagrams (19262 & 91363), while ClassicCarWiring LLC provides comprehensive schematics specifically for 1972 Chevelle, Malibu, and Monte Carlo models.
JEGS Wiring Diagrams (19262 & 91363)
JEGS provides full-color, laminated wiring schematics for 1972 Chevy Chevelles and El Caminos with standard dashes (part #19262). These 11”x17” diagrams feature factory-matching wire color coding, simplifying re-wiring projects.
Additionally, JEGS part #91363 offers another valuable resource for detailed electrical layouts, aiding in accurate restoration and modification efforts.
ClassicCarWiring LLC Diagrams
ClassicCarWiring LLC offers comprehensive color wiring diagrams specifically for 1972 Chevelle, Malibu, and Monte Carlo models. These diagrams cover vehicles with round gauge pods utilizing a 12-pin connector (with 10 pins used) on the circuit board.
They include complete basic car wiring – engine bay, interior, and exterior lights.
Decoding the Wiring Diagram Symbols
Understanding wire colors and connector types is essential for accurate 1972 Chevelle wiring. Diagrams utilize standardized symbols for easy identification and tracing of circuits.
Common Wire Colors and Their Meanings
Factory wiring diagrams reveal consistent color coding. For example, red often indicates a 12-volt power source, while black typically signifies ground. White wires frequently carry signals to instruments. JEGS diagrams specifically match factory colors, simplifying identification during restoration. Understanding these conventions is vital for correctly interpreting the 1972 Chevelle’s wiring schematic and ensuring proper connections.
Identifying Connectors and Terminals
Wiring diagrams detail connector types and pin assignments. The 1972 Chevelle’s dashboard utilizes a 12-pin connector, with only 10 pins actively used. ClassicCarWiring LLC diagrams specifically highlight these details. Correctly identifying these connectors and their corresponding terminals is crucial for accurate reassembly and avoiding electrical faults during the restoration process.
Engine Bay Wiring – Detailed Breakdown
PDF diagrams illustrate ignition and fuel system wiring, essential for a functioning 1972 Chevelle engine. JEGS schematics provide color-coded clarity for these complex circuits.
Ignition System Wiring
Detailed 1972 Chevelle wiring diagrams, like those from JEGS, pinpoint connections for the distributor, coil, and ignition switch. PDFs show wire colors for power supply, points, and electronic ignition upgrades. Understanding these circuits is vital for reliable starting and engine performance, ensuring correct timing and spark delivery.
Fuel System Wiring
1972 Chevelle wiring diagrams illustrate connections for the fuel pump, sending unit, and any associated gauges. PDFs from resources like ClassicCarWiring LLC detail wiring for both mechanical and electric fuel pumps. Correct wiring ensures accurate fuel level readings and reliable fuel delivery to the engine.
Interior Wiring – A Step-by-Step Guide
Wiring diagrams detail the 12-pin connector for dashboard instruments, lighting circuits, and accessories, simplifying interior electrical work for a 1972 Chevelle.
Dashboard Instrument Wiring (12-Pin Connector)
ClassicCarWiring LLC diagrams specifically address the 1972 Chevelle’s dashboard, utilizing a 12-pin connector with 10 pins actively used. PDF schematics illustrate wiring for oil, temperature, and other instrument lights. Careful tracing of wire colors is essential for correct functionality and accurate restoration, referencing the factory diagrams.
Lighting and Accessory Wiring
Wiring diagrams detail the circuits for interior lights, including dome and map lights, alongside accessory connections. PDF resources from JEGS and ClassicCarWiring show how these integrate with the main harness. Correctly identifying wire colors and connector locations is vital for adding or repairing these systems effectively.

Exterior Lighting Wiring
Wiring diagrams illustrate headlight, turn signal, tail light, and brake light circuits; PDFs from JEGS and ClassicCarWiring are essential for proper restoration and repair.
Headlight and Turn Signal Circuits
Detailed 1972 Chevelle wiring diagrams, available from sources like JEGS and ClassicCarWiring LLC, clearly map the headlight and turn signal circuits. PDFs showcase wire colors, connector locations, and proper grounding. Understanding these circuits is vital for diagnosing dim headlights or malfunctioning turn signals, ensuring safe operation and accurate restoration.
Tail Light and Brake Light Wiring
Comprehensive 1972 Chevelle wiring diagrams, such as those from JEGS and ClassicCarWiring LLC, illustrate the tail and brake light circuits. PDFs detail wire routing, bulb connections, and the brake light switch wiring. Correctly interpreting these diagrams is essential for resolving issues like non-functional lights, ensuring visibility and safety.

Troubleshooting Common Wiring Issues
Utilizing a 1972 Chevelle wiring diagram PDF helps pinpoint short or open circuits with a multimeter, efficiently diagnosing electrical faults for restoration projects.
Identifying Short Circuits and Open Circuits
A 1972 Chevelle wiring diagram PDF is invaluable when tracing circuits to locate shorts – unintended connections causing excessive current flow. Conversely, open circuits, breaks in the wiring, prevent current flow.
Employing a multimeter, guided by the diagram, allows testing for continuity and voltage drops, confirming circuit integrity and isolating fault locations efficiently.
Using a Multimeter for Diagnosis
A 1972 Chevelle wiring diagram PDF, combined with a multimeter, empowers accurate electrical system diagnosis. Test voltage at connectors, comparing readings to the diagram’s specifications.
Check for continuity to confirm wire integrity, and measure resistance to identify faulty components. This systematic approach, guided by the diagram, pinpoints issues quickly.
Utilizing PDF Wiring Diagrams Effectively
PDF diagrams allow zooming for detailed views and easy printing. Digital annotation tools help mark tested circuits, streamlining the 1972 Chevelle’s restoration process.
Zooming and Printing for Clarity
High-resolution PDF wiring diagrams, like those from JEGS and ClassicCarWiring, are essential for detailed work. Zooming capabilities allow inspection of intricate connections within the 1972 Chevelle’s system. Printing provides a physical copy for the garage, enabling notes and marking progress during the restoration, ensuring accuracy and ease of reference.
Digital Annotation Tools
Utilizing PDF annotation software enhances the 1972 Chevelle wiring diagram experience. Highlighting circuits, adding notes about tested components, and marking completed connections streamlines the restoration process. These digital tools improve organization and prevent confusion when referencing the complex wiring schematics from sources like JEGS.
Year-Specific Considerations for 1972
1972 Chevelles, including Malibu and Monte Carlo models, utilized a unique 12-pin connector for the dashboard, demanding a diagram specific to this year.
Unique Features of the 1972 Electrical System
The 1972 Chevelle’s electrical system presented specific challenges due to its 12-pin dashboard connector, utilized in Malibu and Monte Carlo models. Wiring diagrams must account for this, showing the ten pins actually used for instruments like oil and temperature gauges.
Differences from Other Chevelle Years
1972 Chevelles, particularly Malibu and Monte Carlo models, featured a unique 12-pin connector for the dashboard instruments. Earlier or later Chevelle years utilized different configurations, necessitating year-specific wiring diagrams for accurate restoration. Ignoring these differences can lead to functional issues.

Safety Precautions When Working with Wiring
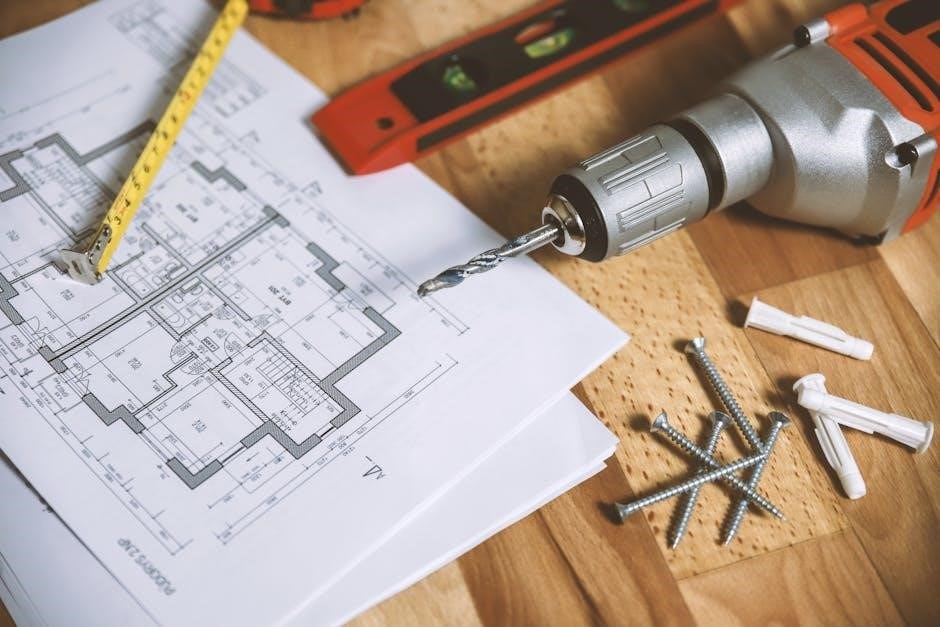
Always disconnect the battery before starting any electrical work. Utilize proper tools to prevent shorts and damage, ensuring a safe restoration process.
Disconnecting the Battery
Before commencing any wiring work on your 1972 Chevelle, completely disconnect the negative battery cable. This crucial step prevents accidental short circuits and potential electrical fires. Ensure the cable is securely isolated to avoid unintended contact. Proper disconnection safeguards both you and the vehicle’s electrical components during the restoration process.
Proper Tool Usage
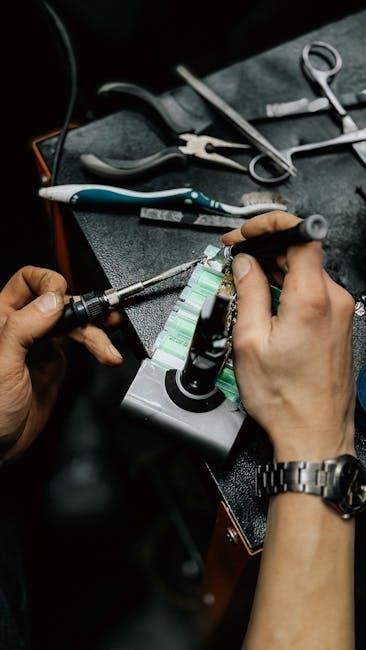
When working with your 1972 Chevelle’s wiring, utilize insulated tools specifically designed for automotive electrical work. Avoid using worn or damaged tools that could compromise safety. A multimeter is essential for testing circuits, while crimpers and wire strippers ensure secure connections. Correct tools prevent damage and ensure a reliable restoration.
Resources for Replacement Wiring Harnesses
Aftermarket options provide complete or partial harnesses, while restoring original harnesses requires careful diagram referencing and component sourcing for a correct 1972 Chevelle.
Aftermarket Harness Options
Numerous vendors offer complete 1972 Chevelle wiring harnesses, simplifying restoration. These often feature updated materials and connectors for improved reliability. Partial harnesses targeting specific systems – like the engine bay or interior – are also available. Consider brands specializing in classic car wiring for accurate reproduction and ease of installation, referencing your diagram.
Restoring Original Harnesses
Restoring the original harness requires meticulous work, utilizing the 1972 Chevelle wiring diagram as a guide. Carefully inspect for damaged wires, brittle insulation, and corroded connectors. Replace damaged sections with correct gauge wire and connectors, ensuring proper color coding for accurate restoration and functionality.

The Significance of 1972 – Historical Context
1972 was the longest year in history due to a leap day and leap seconds, coinciding with the Chevelle’s production and wiring configurations.
Major Events of 1972 and Their Impact
While political unrest and cultural shifts defined 1972, the introduction of the F-15 Eagle fighter jet demonstrates technological advancement. These events indirectly influenced automotive manufacturing, potentially impacting Chevelle wiring standardization and component sourcing. The year’s complexities didn’t directly alter the diagrams, but reflect the era’s innovation.
The Longest Year in History – Leap Year Details
1972’s unique length, due to a leap day and two leap seconds, is a historical curiosity. This extended timeframe didn’t directly affect Chevelle production or wiring diagrams. However, meticulous record-keeping during this period ensured accurate documentation, contributing to the availability of reliable 1972 Chevelle wiring schematics today.
1972 Chevelle Model Variations & Wiring Differences
Malibu and SS Chevelles exhibit wiring variations, necessitating specific diagrams. Monte Carlo wiring differs further; diagrams from ClassicCarWiring LLC address these distinctions effectively.
Malibu vs. SS Wiring
The 1972 Chevelle Malibu and SS models present distinct wiring configurations. SS models often included additional factory options, like upgraded gauges or power accessories, requiring specific wiring schematics. JEGS diagrams (19262) cater to standard dashes, while ClassicCarWiring LLC diagrams comprehensively cover both Malibu and SS variations, ensuring accurate restoration or modification efforts.
Monte Carlo Wiring Considerations
The 1972 Monte Carlo shares wiring similarities with the Chevelle Malibu, but requires specific attention to detail. ClassicCarWiring LLC diagrams specifically address Monte Carlo models, detailing the 12-pin connector on the circuit board – utilizing 10 pins. Accurate diagrams are vital due to unique instrument lighting configurations.
Advanced Wiring Techniques
Modern accessories and electronic ignition upgrades necessitate careful integration with the 1972 Chevelle’s existing wiring, demanding a thorough understanding of the diagrams.
Adding Modern Accessories (Stereo, etc.)
Integrating modern stereos, amplifiers, or other accessories requires identifying suitable power sources within the 1972 Chevelle’s wiring. Utilizing the wiring diagram PDF is essential to locate appropriate circuits and avoid overloading existing systems. Careful planning and proper fusing are critical for safe and reliable operation, ensuring compatibility with the classic vehicle’s electrical infrastructure.
Upgrading to Electronic Ignition
Switching to electronic ignition demands a thorough understanding of the 1972 Chevelle’s original ignition wiring. The wiring diagram PDF reveals the connections for the distributor, coil, and ignition module. Correctly identifying and adapting these wires is vital for a successful upgrade, maximizing performance and reliability while maintaining safety standards.
Maintaining Your 1972 Chevelle’s Electrical System
Utilizing the 1972 Chevelle wiring diagram PDF ensures accurate repairs and upgrades, preserving the vehicle’s electrical integrity for lasting performance and enjoyment.
Regular Inspection and Maintenance
Consistent use of the 1972 Chevelle wiring diagram PDF facilitates proactive inspections, identifying potential issues before they escalate. Regularly check connections for corrosion, ensuring secure fits. This preventative maintenance, guided by the diagram, extends the system’s lifespan and minimizes unexpected failures, preserving the car’s functionality.
Long-Term Reliability Tips
Employing the 1972 Chevelle wiring diagram PDF during repairs ensures correct connections, vital for long-term reliability. Utilize quality connectors and weatherproof wiring where applicable. Periodically review the diagram to understand the system, aiding future troubleshooting and preventing issues stemming from incorrect modifications.