
powerflex 755 installation manual
PowerFlex 755 Installation Manual: A Comprehensive Guide
This manual details the installation process for the PowerFlex 755 drive, covering crucial aspects from initial unpacking to final programming and troubleshooting․
It provides detailed instructions, safety precautions, and component overviews to ensure a successful and reliable installation․
Furthermore, the guide includes specific sections on mounting options, electrical connections, and communication setup, including Modbus RTU configuration․
Finally, it offers insights into interlock assembly installation, fault code interpretation, and application-specific setups like centrifugal fan/pump control․

The PowerFlex 755 is a robust and versatile AC drive designed for a wide range of industrial applications, offering precise motor control and enhanced system performance․ This drive excels in controlling centrifugal pumps, fans, and various other constant-torque and variable-torque loads․ It’s engineered to deliver reliable operation, advanced features, and seamless integration into diverse automation systems․
This installation manual serves as a comprehensive guide for safely and effectively installing, configuring, and commissioning the PowerFlex 755 drive․ It’s intended for qualified personnel with a solid understanding of electrical systems, motor control principles, and relevant safety regulations․ Proper installation is paramount to ensuring optimal drive performance, longevity, and adherence to warranty stipulations․
Throughout this document, you’ll find detailed instructions, clear diagrams, and essential safety precautions․ We strongly recommend thoroughly reviewing this manual before commencing any installation work․ Understanding the drive’s components, mounting requirements, electrical connections, and programming procedures is crucial for a successful implementation․ This guide also references supplementary resources, such as application-specific setup guides for centrifugal fans and pumps, to further assist in your installation process․
The PowerFlex 755 is a key component in modern industrial automation, and this manual empowers you to harness its full potential․
Safety Precautions
Prior to any installation or maintenance work on the PowerFlex 755, it is absolutely critical to disconnect all sources of electrical power․ Failure to do so presents a severe risk of electric shock, potentially leading to serious injury or even fatality․ Always verify the absence of voltage using a calibrated measuring device before proceeding․
Qualified personnel only should perform the installation, commissioning, and servicing of this drive․ Individuals must possess the necessary training and experience to work safely with high-voltage electrical equipment and understand the inherent hazards involved․ Adherence to all applicable local and national electrical codes is mandatory․
Always wear appropriate personal protective equipment (PPE), including safety glasses, insulated gloves, and appropriate clothing․ Avoid working in wet or damp environments, as this increases the risk of electrical shock․ Ensure the work area is well-lit and free of obstructions․ Be mindful of stored energy within capacitors – allow sufficient discharge time before touching any internal components․
This drive contains high-voltage components that can remain energized even after the main power supply is disconnected․ Exercise extreme caution and follow all safety guidelines outlined in this manual to prevent accidental contact and ensure a safe working environment․
Unpacking and Inspection
Upon receiving your PowerFlex 755 drive, carefully inspect the shipping container for any signs of damage incurred during transit․ Note any visible dents, punctures, or crushing damage on the packaging before accepting the shipment․ If damage is apparent, immediately file a claim with the carrier and notify the supplier․
Once the packaging is opened, verify that all components listed on the packing list are present․ This includes the drive itself, any optional modules or accessories ordered, and the accompanying documentation (manuals, quick start guides, etc․)․ Carefully examine the drive for any physical damage, such as cracked housings, bent fins, or loose components․
If any discrepancies or damage are detected, do not attempt to install or operate the drive․ Contact the supplier immediately to report the issue and arrange for a replacement․ Retain all original packaging materials for potential return or inspection․ Proper documentation of any damage is crucial for processing claims efficiently․
Ensure the drive’s nameplate information (voltage, current, horsepower) matches your application requirements before proceeding with installation․ This verification prevents potential compatibility issues and ensures optimal performance․
Drive Components Overview
The PowerFlex 755 drive comprises several key components, each playing a vital role in its operation․ The main enclosure houses the power module, control circuitry, and operator interface․ The power module converts incoming AC power to DC and then back to AC with variable frequency and voltage․
The control board manages the drive’s logic, communication, and input/output signals․ A key element is the Human Interface Module (HIM), providing a user-friendly display for monitoring drive status, parameters, and fault codes․ Optional modules, such as communication adapters (e․g․, Modbus RTU), can be added for enhanced connectivity․
The drive also features input and output terminals for connecting control signals, feedback devices, and the motor․ Heatsinks are integrated to dissipate heat generated during operation, ensuring reliable performance․ Familiarizing yourself with these components is crucial for successful installation, troubleshooting, and maintenance․
Finally, the frame size dictates the drive’s physical dimensions and power capacity․ Understanding the function of each component allows for informed decisions during setup and operation, maximizing the drive’s potential․
Mounting the Drive
Proper mounting is critical for ensuring optimal PowerFlex 755 performance and longevity․ The drive can be mounted horizontally or vertically, depending on available space and application requirements․ Before mounting, verify the mounting surface is structurally sound and capable of supporting the drive’s weight․
Ensure adequate ventilation around the drive to prevent overheating․ Maintain sufficient clearance on all sides, as specified in the drive’s documentation․ When mounting, use appropriate hardware, such as screws and washers, to secure the drive firmly to the surface․ Avoid over-tightening, which could damage the enclosure․
For installations involving multiple drives, consider sub-panel flexing․ Support pieces should be added to the underside of the panel along each long edge to mitigate vibration and maintain structural integrity․ Refer to the guidelines for single drive unit installations for detailed instructions․

Always adhere to the recommended mounting orientations and clearances to prevent operational issues and ensure safe, reliable operation of the PowerFlex 755 drive․
Horizontal Mounting Guidelines
When horizontally mounting the PowerFlex 755, prioritize maintaining adequate airflow for effective heat dissipation․ The drive should be positioned to allow unobstructed air circulation across the heat sink․ Ensure sufficient clearance above and below the unit – typically several inches – to facilitate natural convection․
For open-type (IP00/NEMA/UL) installations, consider the surrounding environment․ Mounting the drive on a solid, stable surface is crucial to minimize vibration․ Utilize appropriate mounting hardware, ensuring it’s securely fastened but not over-tightened to avoid enclosure distortion․
To guard against sub-panel flexing, especially with larger drives, support pieces should be affixed to the underside of the mounting panel along its length․ This provides additional structural support and prevents unwanted movement․ Refer to the documentation for specific recommendations based on drive size and weight․
Always verify that the mounting orientation aligns with the drive’s specified operating parameters․ Proper horizontal mounting contributes to reliable performance and extends the lifespan of the PowerFlex 755․
Vertical Mounting Guidelines
Vertical mounting of the PowerFlex 755 requires careful consideration of airflow and heat dissipation․ Unlike horizontal mounting, warm air rises naturally, so ensure the drive is positioned to allow unimpeded upward airflow․ Avoid obstructions above the unit that could trap heat․
When mounting vertically, secure the drive firmly to a stable surface using appropriate mounting hardware․ Verify that the mounting surface can support the drive’s weight․ Employ vibration-dampening measures if the installation environment is prone to excessive vibration․
Pay close attention to the drive’s orientation․ Typically, the control terminal end should be positioned downwards to facilitate easier wiring access․ Ensure sufficient clearance around the drive for cable routing and maintenance access․
It’s crucial to consult the PowerFlex 755 documentation for specific vertical mounting recommendations, including any derating requirements that may apply․ Proper vertical mounting ensures optimal performance and longevity of the drive․
Sub-Panel Flexing Support
To mitigate potential issues caused by sub-panel flexing, especially with larger PowerFlex 755 drives, supplemental support is highly recommended․ Sub-panel flexing refers to the bending or distortion of the electrical enclosure panel when the drive operates, potentially damaging wiring or the drive itself․
The installation manual advises adding support pieces to the underside of the panel along each long edge․ These supports should run the entire length of the drive and be securely fastened to the panel․ The material used for these supports should be rigid and capable of withstanding any anticipated vibrations․
Properly implemented support minimizes stress on the drive’s mounting points and prevents unwanted movement․ This is particularly important in environments with significant vibration or where the panel is not inherently robust․
Refer to Figure 8 in the documentation for a visual representation of open-style drive horizontal installation with appropriate sub-panel support․ Implementing these guidelines ensures a stable and reliable installation․
Electrical Connections
Establishing secure and correct electrical connections is paramount for the safe and reliable operation of the PowerFlex 755 drive․ This section details the procedures for both input and output power wiring, alongside crucial grounding requirements․ Always disconnect power before commencing any electrical work․
Input power wiring must adhere to local and national electrical codes, utilizing appropriately sized conductors and overcurrent protection․ Ensure proper voltage and phase matching between the power source and the drive’s specifications․ Double-check all connections for tightness and insulation integrity․

Output power wiring to the motor requires similar attention to detail․ Correctly sized conductors are essential to prevent overheating and voltage drop․ Shielded motor cables are recommended to minimize electromagnetic interference (EMI)․
Grounding is critical for safety and performance․ The drive chassis must be securely grounded to the electrical panel, following established grounding practices․ Proper grounding minimizes electrical noise and protects personnel from shock hazards․
Input Power Wiring

Proper input power wiring is fundamental to the reliable operation of the PowerFlex 755․ Before commencing, always verify the drive’s voltage and phase requirements match the available power supply․ Disconnect and lock out all power sources before making any connections․
Utilize appropriately sized conductors, determined by the drive’s full-load current and applicable electrical codes․ Overcurrent protection, such as fuses or circuit breakers, must be installed upstream of the drive, sized according to manufacturer recommendations․
Wiring configurations vary depending on the voltage (e․g․, 230V, 460V, 575V) and phase (single-phase or three-phase)․ Refer to the drive’s wiring diagrams for specific connection details․ Ensure all connections are tight and secure to prevent arcing or overheating․
Consider using a line reactor or input choke to mitigate harmonic distortion and improve power factor, especially in installations with multiple drives․ Shielded cable is recommended to reduce electromagnetic interference (EMI) and ensure compliance with safety standards․
Output Power Wiring
Connecting the motor to the PowerFlex 755 requires careful attention to wire sizing and proper grounding․ Before starting, always de-energize the drive and verify the motor’s voltage and current ratings align with the drive’s output capabilities․
Employ appropriately gauged conductors capable of handling the motor’s full-load current, adhering to local electrical codes; Motor overload protection, typically thermal overloads, should be integrated into the motor circuit for safeguarding against overheating․
Utilize a dedicated circuit for each motor controlled by the drive, avoiding shared circuits to prevent nuisance tripping and ensure reliable operation․ Shielded motor cables are highly recommended to minimize electromagnetic interference (EMI) and maintain signal integrity․
Properly terminate the motor leads at the drive’s output terminals, ensuring secure connections to prevent arcing or voltage drops․ Consider using a braking resistor for regenerative drives to dissipate excess energy during deceleration, extending the lifespan of the drive and motor․
Grounding Requirements

Effective grounding is paramount for safety and optimal performance of the PowerFlex 755 drive․ A robust grounding system minimizes electrical noise, protects personnel from shock hazards, and ensures proper operation of protective devices․

Connect the drive’s grounding terminal to a dedicated grounding conductor, adhering to local and national electrical codes․ This conductor should be sized appropriately for the anticipated fault current and connected to a verified earth ground․
Employ a low-impedance grounding path to minimize voltage drops during fault conditions․ Avoid using conduit as the primary grounding conductor, as it may not provide sufficient current-carrying capacity․
Ensure the motor frame is also properly grounded, connecting it to the same grounding point as the drive․ This creates a common ground reference, reducing the risk of circulating currents and improving EMI immunity․ Regularly inspect grounding connections for tightness and corrosion, maintaining a reliable grounding system throughout the drive’s lifespan․
Control Wiring
Proper control wiring is essential for seamless integration and operation of the PowerFlex 755 drive within your automation system․ This involves connecting the drive’s control terminals to external devices like PLCs, switches, and sensors․
Utilize shielded control cables to minimize the impact of electromagnetic interference (EMI) on control signals․ Ground the cable shield at the drive end to provide a reliable path for noise dissipation․ Maintain separation between control cables and power cables to further reduce interference․
Carefully observe terminal assignments when connecting control signals, referencing the drive’s wiring diagrams․ Incorrect wiring can lead to unexpected behavior or damage to the drive or connected devices;
Consider using terminal blocks for neat and organized wiring, facilitating troubleshooting and maintenance․ Ensure all connections are secure and properly tightened to prevent signal loss or intermittent operation․ Verify the voltage levels of control signals are compatible with the drive’s input requirements․
Digital Input Configuration
The PowerFlex 755 offers versatile digital input configuration, allowing customization of drive behavior based on external signals․ These inputs accept discrete signals, typically from switches, sensors, or PLC outputs, to control drive functions like start, stop, forward, reverse, and fault reset․
Each digital input can be assigned a specific function through drive parameters․ Common configurations include designating inputs for speed reference selection, torque limit activation, or emergency stop initiation․ Carefully plan your input assignments to align with your application requirements․
Configure input filtering to reject noise and prevent spurious triggering․ Adjust the filtering time constant to suit the signal characteristics and operating environment․ Consider using a pull-up or pull-down resistor if the input signal source does not provide a defined state when inactive․
Verify the polarity of the input signals and ensure they are within the drive’s voltage range․ Incorrect polarity or voltage levels can lead to unpredictable behavior․ Thoroughly test all digital input configurations to confirm proper functionality before commissioning the drive․

Analog Input Configuration
The PowerFlex 755’s analog input configuration provides a means to control drive parameters using variable voltage or current signals․ These inputs typically receive signals from potentiometers, process controllers, or PLC analog outputs, enabling precise control of speed, torque, or other drive functions․
Configure the analog input scaling to map the input signal range to the desired parameter range․ Define the minimum and maximum input values and their corresponding output values․ Proper scaling is crucial for achieving accurate control and preventing parameter values from exceeding safe limits․
Select the appropriate input type – voltage or current – based on the signal source․ Ensure compatibility between the drive’s input impedance and the signal source’s output impedance․ Utilize filtering to minimize noise and improve signal stability, adjusting the filter time constant as needed․
Consider signal conditioning if the input signal requires amplification, attenuation, or isolation․ Verify the signal polarity and ensure it aligns with the drive’s input requirements․ Thoroughly test the analog input configuration to validate its accuracy and responsiveness before full operation․
Modbus RTU Communication Setup
Establishing Modbus RTU communication with the PowerFlex 755 allows for remote monitoring and control via a serial interface․ This setup enables integration with PLCs, HMIs, and other Modbus-compatible devices, facilitating centralized automation and data acquisition․
Configure the drive’s Modbus address to uniquely identify it on the network․ Ensure this address doesn’t conflict with other devices․ Set the communication baud rate, parity, data bits, and stop bits to match the master device’s settings․ Correct parameterization is vital for reliable data exchange․
Define the Modbus registers to be read from or written to the drive․ Utilize the drive’s Modbus register map to identify the appropriate registers for specific parameters․ Implement error handling to detect and manage communication failures, ensuring system stability․
Test the communication link using a Modbus master device․ Verify that data is being transmitted and received correctly․ Optimize the communication timeout settings to balance responsiveness and robustness․ Secure the serial connection to prevent unauthorized access․
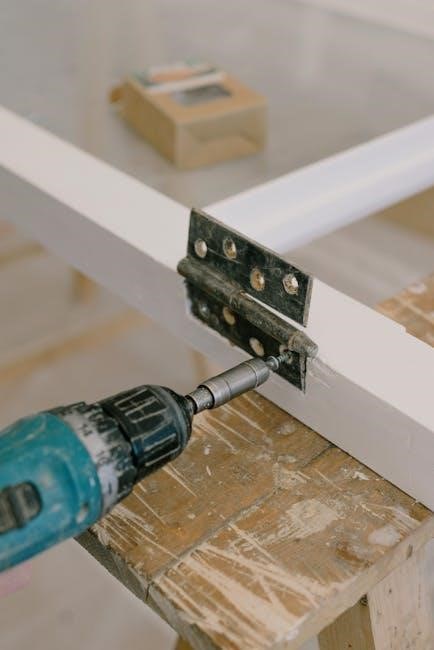
Interlock Assembly Installation
The interlock assembly provides a crucial safety feature, preventing access to live electrical components when the drive is energized․ Proper installation is paramount for personnel safety and adherence to safety regulations․ This assembly mechanically inhibits the disconnect handle from operating while the drive is running․
Begin by positioning the interlock rod beneath the clamp assembly, ensuring correct alignment as illustrated in the documentation․ Securely fasten the set screw to the right of the clamp, locking the rod in place․ Verify the pins on the disconnect handle align precisely with the corresponding openings in the interlock assembly․
Carefully align the disconnect handle with the interlock mechanism, ensuring smooth engagement․ Adjust the set screw as needed to achieve proper alignment and prevent binding․ Confirm the interlock functions correctly, preventing handle operation when the drive is powered․
Double-check all connections and ensure the assembly is securely mounted․ Regularly inspect the interlock for wear or damage, replacing components as necessary․ A functioning interlock is essential for maintaining a safe working environment․
Interlock Rod Positioning
Precise interlock rod positioning is critical for the effective operation of the safety mechanism․ Incorrect placement can compromise the system’s ability to prevent accidental access to energized components, creating a hazardous situation․ The rod acts as a physical barrier, linking the drive’s operational state to the disconnect handle․
Begin by carefully sliding the interlock rod underneath the clamp assembly, referencing the detailed illustrations in the installation manual․ Ensure the rod is fully seated and aligned with the mounting points․ The rod’s orientation must correspond to the direction of handle movement․
Pay close attention to the rod’s markings or indicators, if present, to confirm correct positioning․ Verify that the rod doesn’t interfere with any adjacent components or wiring․ Proper alignment prevents binding and ensures smooth operation of the interlock․
Once positioned, secure the rod using the provided fasteners, tightening them to the specified torque․ Regularly inspect the rod for any signs of shifting or loosening, and re-tighten as needed․ Accurate rod positioning is fundamental to a safe and reliable interlock system․
Set Screw Adjustment
Precise set screw adjustment is paramount for securing the interlock assembly to the disconnect handle shaft, ensuring a robust and reliable connection․ Improper adjustment can lead to slippage, compromising the safety interlock function and potentially creating a hazardous condition․ The set screw provides a clamping force to maintain alignment․

Begin by positioning the set screw to the right of the clamp assembly, as illustrated in the installation guide․ Gently tighten the screw until it makes firm contact with the shaft․ Avoid over-tightening, which could damage the shaft or the clamp assembly․
Use a properly sized Allen wrench to apply even pressure while tightening․ Check for any signs of deformation or stress on the components․ The set screw should securely hold the assembly in place without restricting the handle’s movement․
After initial adjustment, verify the interlock’s functionality by operating the disconnect handle through its full range of motion․ Re-check the set screw tightness periodically to account for vibration or thermal expansion․ Correct adjustment guarantees a secure and functional interlock system․
Disconnect Handle Pin Alignment
Achieving correct disconnect handle pin alignment is critical for seamless integration of the interlock assembly and proper operation of the disconnect mechanism․ Misalignment can prevent full engagement of the interlock, rendering it ineffective and potentially creating a safety hazard․ Careful attention to detail during this step is essential․
Ensure the pins (C) on the disconnect handle are correctly positioned to engage with the corresponding holes in the interlock rod and clamp assembly․ Verify that the pins slide smoothly into the holes without any binding or resistance․
If resistance is encountered, do not force the connection․ Re-examine the positioning of the interlock rod and clamp assembly, and adjust as needed․ Slight adjustments to the set screw may be required to achieve optimal alignment․
Once aligned, confirm that the disconnect handle operates freely through its full range of motion, engaging and disengaging the interlock as intended․ Proper pin alignment guarantees a secure and reliable interlock system, safeguarding personnel and equipment․
Programming the Drive
Programming the PowerFlex 755 drive is essential to tailor its operation to your specific application requirements․ This process involves configuring parameters that define motor characteristics, speed control, acceleration/deceleration rates, and protection features․ Access to the drive’s programming interface is typically achieved through the Human Interface Module (HIM) or via a computer using Rockwell Automation’s Studio 5000 software․
Begin by establishing communication with the drive and navigating to the parameter programming section․ Carefully review the parameter list and understand the function of each parameter before making any changes․ Incorrect parameter settings can lead to improper drive operation or even damage to the motor․
Key parameters to configure include motor voltage, current, frequency, and speed setpoint source․ Additionally, configure fault protection settings to safeguard the drive and motor from overcurrent, overvoltage, and other potentially damaging conditions․ Save your configuration regularly to prevent data loss․
Thorough testing after programming is crucial to verify correct operation and ensure the drive meets your application’s performance expectations․
Manual Fault Codes Overview
The PowerFlex 755 drive utilizes a comprehensive fault code system to diagnose and address operational issues․ These codes provide valuable insights into the nature of the problem, enabling efficient troubleshooting and minimizing downtime․ Understanding these codes is crucial for effective maintenance and repair․
Fault codes are categorized based on the severity and source of the problem, ranging from minor warnings to critical alarms that shut down the drive․ Common fault codes relate to issues such as overcurrent, overvoltage, undervoltage, motor overload, and communication errors․
When a fault occurs, the drive displays the corresponding fault code on the Human Interface Module (HIM)․ Refer to the PowerFlex 755’s detailed fault code list in the user manual to decipher the meaning of each code․ The manual provides specific troubleshooting steps and recommended corrective actions․
Remember to document all fault occurrences and the actions taken to resolve them․ This historical data can help identify recurring problems and improve overall system reliability․ Ignoring fault codes can lead to more serious damage and costly repairs․
Centrifugal Fan/Pump Setup
The PowerFlex 755 drive is ideally suited for controlling centrifugal fans and pumps, offering optimized performance and energy savings․ Proper setup requires careful consideration of application-specific parameters to ensure smooth and efficient operation․
Key parameters for centrifugal fan/pump control include motor nameplate data, speed range, acceleration/deceleration times, and overload protection settings․ The drive’s auto-tuning feature can assist in optimizing these parameters for the specific load characteristics․
Consider utilizing the drive’s PID control functionality for precise flow or pressure regulation․ This allows the drive to automatically adjust the motor speed to maintain the desired setpoint, even with varying system demands․ Proper PID tuning is essential for stable and responsive control․
Furthermore, implement appropriate motor protection features, such as thermal overload protection and phase loss detection, to prevent damage to the motor and driven equipment․ Regularly monitor drive performance and adjust parameters as needed to maintain optimal efficiency․
Installation Supplies (HE-C3)
The HE-C3 installation supplies kit contains essential components to facilitate a secure and compliant installation of the PowerFlex 755 drive․ This kit is designed to ensure proper mounting, electrical connections, and overall system integrity․
Key components within the HE-C3 kit typically include mounting hardware such as screws, washers, and brackets, suitable for both horizontal and vertical mounting configurations․ Additionally, the kit provides wire labels for clear identification of conductors and terminals․
Furthermore, the kit often includes grounding straps and connectors to ensure a robust and reliable grounding connection, crucial for safety and electromagnetic compatibility․ Specific kits may also contain conduit connectors and mounting templates for streamlined installation․
It’s important to verify the kit contents against the packing list to ensure all necessary items are present before commencing installation․ Utilizing genuine Allen-Bradley installation supplies guarantees compatibility and adherence to industry standards, maximizing system performance and longevity․